Features
Elements
Every element depicted below has a visual representation of what state the element is in, excluding the link elements, log elements and cloud controller element. Translucent represents the element has no state and is waiting to be activated. Yellow represents the element that is in the process of being deployed. Blue represents a successful deployment and is running successfully. Red represents a failed deployment and error state.
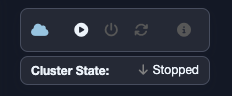
Cloud controller Element
The Cloud Controller Element is a visual representation of how you control your cluster’s state and obtain information about the currently deployed cluster. Starting the cluster with the play button will initiate Terraform scripts that build a given cluster in the user’s chosen cloud service provider or on-premises environment. Stopping the cluster with the power button will initiate Terraform scripts that tear down the given cluster and any associated resources. The frontend calls a backend service, which contains the underlying logic required to execute and fulfill the user’s requests. This backend service manages these machines and their supporting infrastructure using HashiCorp Terraform. It dynamically generates the required inputs for Terraform based on the user’s requested state. These inputs are injected into the Terraform execution environment using environment variables.
The backend service executes Terraform within this environment by copying the generated Terraform files into a temporary directory, injecting the saved state for Terraform, setting up the environment variables, and executing Terraform. It then captures all output from Terraform to monitor for errors and to communicate progress to the frontend. Once Terraform completes, the backend service saves any necessary outputs, including secrets and state, for future changes. The deployed cluster includes a set of base services and is configured to dynamically interact with the underlying cloud provider. This allows for automated provisioning of volumes, services, and other cloud-native services directly from within the cluster. Additionally, this setup enables features such as autoscaling and other functionalities that require integration between the cloud provider and the Kubernetes cluster managed by harpoon.
The information icon on the Cloud Controller Element displays the cluster’s cloud provider, number of nodes, harpoon IAC version, Kubernetes version, cluster state, and any errors. The upgrade cluster icon initiates Terraform scripts to update your existing cluster to the latest harpoon IAC version using Terraform.
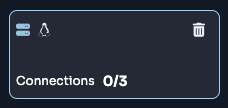
Node Element
The Node Element is a visual representation of a virtual machine running within a user’s cloud service provider account. Multiple nodes constitute a cluster. This cluster can be scaled up by adding more available nodes if the user has any at their disposal. Conversely, the cluster can be scaled down by deleting a node. Up to three elements may be attached to a given node at any one time.
The Node Element maps to a set of machines that together form a Kubernetes cluster. Users can change the OS type of a node by clicking on the OS icon displayed on the node. Currently, harpoon only supports Windows nodes on Azure AKS clusters.
Node Group Element
The Node Group element is a visual representation of a set of virtual machines running within a users cloud provider account. You can scale the cluster up by adding additional node groups (when capacity is available) and scale it down by deleting a node group. You can also enable autoscaling or change the node OS type in the node group settings. Currently, harpoon supports only Windows nodes on Azure Kubernetes Service (AKS) clusters.

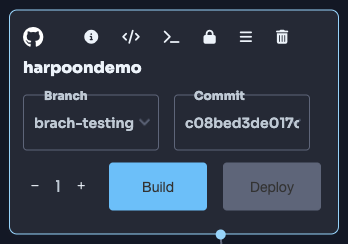
Git Element
The git element is a visual representation of a git repository which can be either a public or private repository. A given git repository can be built with a pre-existing docker file or write their own build commands and choose their own operating system to build the repository.
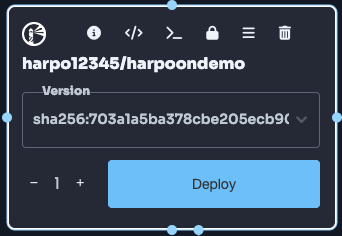
Docker Element
The docker element is a visual representation of a docker container image that can be deployed to a cluster. When a user calls for the deployment of a container on the frontend, a backend service is called to process the request. The frontend passes the image and configuration information to the backend for the creation of the container. harpoon stores the kubeconfig required to connect and interact with a cluster so that requests can be made directly to the cluster. The backend service takes the information provided by the frontend and dynamically generates a set of Kubernetes manifests to allow for the deployment of the container to the running cluster. The exact manifests generated vary based on the exact nature of the request from the frontend but generally, a Kubernetes Deployment object is created to instruct the cluster to deploy the container. The backend service then deploys these manifests to the cluster using its API and then watches for a successful or unsuccessful deployment of the container. The state and status of the deployment is communicated to the frontend to show the user what the state of their request is.

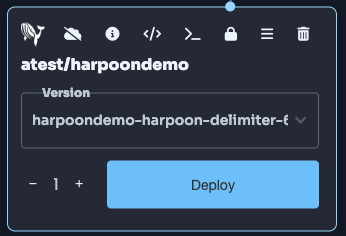
Harpoon container Element
The harpoon container element is a visual representation of an image pushed to the private harpoon container registry. To see how to get harpoon container elements please see the Auto deployments section at the bottom of this page.
Harbor conatiner Element
The harbor container element is a visual representation of a harbor image from the users linked harbor account.
Helm chart Element
The helm chart element is a visual representation of a helm chart from either the users linked harbor account or through the harpoon api.

Link Element
The link element is a visual representation of a link between elements on the graph. Links are attached by dragging from one element to another until the second element is selected. A link represents a relationship between elements and how they are deployed in Kubernetes. Each element is outlined below.
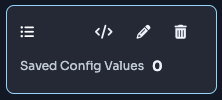
ConfigMap Element
The config map element is a visual representation of Kubernetes ConfigMaps. A ConfigMap in Kubernetes is a Key/Value pair. ConfigMap elements can only be attached to git or container elements. When a ConfigMap element is attached to a git or container element, it modifies the deployment descriptor for the relevant Kubernetes pod that is already deployed in the Kubernetes cluster and then executes a command in Kubernetes to update the configuration for that deployment using the Kubernetes API. Much like the Container deployments, the frontend makes a call to the backend which generates the required manifests and pushes them to Kubernetes dynamically on behalf of the user. The backend service also modifies the associated container deployment to expose the created ConfigMap, in the user-specified manner, to the running container deployment.
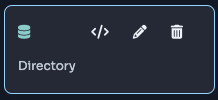
Volume Element
The Volume element is a visual representation of a Kubernetes Persistent Volume Claim (PVC) for a given git or container element. Users can input the volume directory location inside a Kubernetes Pod where the data will be replicated to a distributed volume in the cloud. Volume elements can only be attached to git or container elements. When a Volume element is attached to a git or container element, it modifies the deployment descriptor for the relevant Kubernetes pod that is already deployed in the Kubernetes cluster and then executes a command in Kubernetes to update the configuration for that deployment using the Kubernetes API. The PVC in Kubernetes that is deployed will be dynamically linked to the distributed volume in the cloud. Much like the Container deployments, the frontend makes a call to the backend which generates the required manifests and pushes them to Kubernetes dynamically on behalf of the user. The backend service also modifies the associated container deployment to expose the created Volume, in the user-specified manner, to the running container deployment.
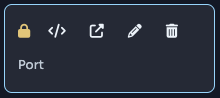
Ingress Element
The ingress element is a visual representation of a Kubernetes Ingress Route for the deployed git or container element. Users can directly input the port number that will be used to open the port for the relevant Pod in Kubernetes. Clicking the lock image on an ingress element will open the lock and open the attached Container/Pod to the internet. Ingress elements can only be attached to git or container elements. When an Ingress element is attached to a git or container element, it modifies the deployment descriptor for the relevant Kubernetes pod that is already deployed in the Kubernetes cluster and then executes a command in Kubernetes to update the configuration for that deployment using the Kubernetes API. Depending on the exact cloud provider and ingress plane configured by the Kubernetes deployment, harpoon will generate the required manifests to configure Ingress at the Kubernetes level. For some Service Mesh based deployments, the harpoon backend services will deploy a loadbalancer using the same Terraform mechanism used for the rest of the cluster. This is then configured to interact with the Service Mesh within the cluster to allow for automated configuration of ingress into the cluster. The backend service will then monitor the standup of the route both internally and externally to inform the user that the route is ready for use. This can include monitoring DNS servers to watch for when names propagate and are ready for use by users.
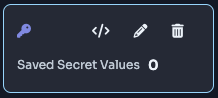
Secret Element
The secret element is a visual representation of Kubernetes secrets storage for a given git or container element. Secret elements can only be attached to git or container elements. A secret element also takes a key/value pair, much like a ConfigMap, but offers more security/encryption through the Kubernetes secrets storage capability. When the Secret element is attached to a git or container element, it enables the relevant Kubernetes Pod to then use the key associated with the secret as a reference to the value of the secret, thereby obfuscating the true value of the secret in any source code or variables in use by the Pod and giving the option to dynamically modify the secret value without updating the software running in the Pod. Much like the Container deployments, the frontend makes a call to the backend which generates the required manifests and pushes them to Kubernetes dynamically on behalf of the user. The backend service also modifies the associated container deployment to expose the created Secret, in the user-specified manner, to the running container deployment.
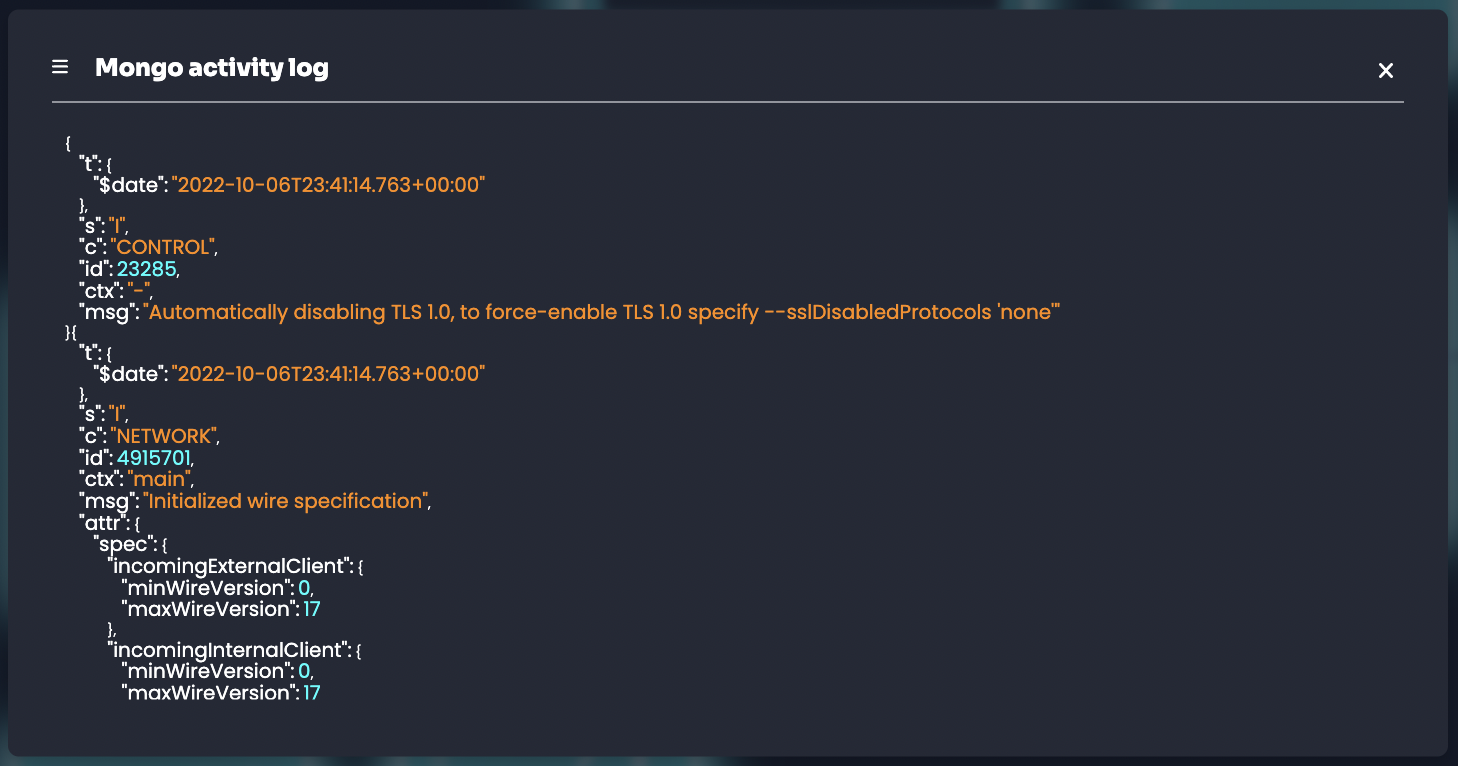
Pod Log Element
The log element is a visual representation of logs outputted by the deployed Kubernetes Pods giving users the ability to see what is happening inside their deployed container image. When a user clicks the log button on a specific container or git element that is already deployed (via the Deploy button), a request is made to harpoon’s deployment microservice to retrieve the logs. The deployment microservices calls the Kubernetes API to return the logs for the specified pod ID within the relevant namespace. The deployment service waits for Kubernetes to return the response and then forwards that response to the harpoon frontend to display the relevant log data to the user. The harpoon backend services connect directly to the Kubernetes API for the user cluster, using the same dynamic mechanism as the other Kubernetes objects, to pull logs for the user deployments. These are then sent to the frontend for visualization by the user.
Search
Search git repositories (public and private)
Users can search for both public and private git repositories. A user links their Github account (a third-party provider) to harpoon using a token from GitHub. When the user searches for a repository by typing in the text of their search term (string), the string is sent to a harpoon microservice where it is combined with the token to make a request to the Github API to find relevant repositories that match the string. When a response is received from the GitHub API, the harpoon microservice sends the response to the harpoon frontend to display with all the relevant data associated in JSON format that can be parsed into the display.
Search for container images
Users can search for container images. A user searches for a container image by typing in the text of their search term (string), the string is sent to a harpoon microservice to make a request to Docker Hub to find relevant container images that match the string. When a response is received from Docker Hub, the harpoon microservice sends the response to the harpoon frontend to display with all the relevant data associated in JSON format that can be parsed into the display.
Third-party Integration
Link accounts
Users have the ability to link their third-party accounts to harpoon in order to search for software to deploy using harpoon in a drag and drop fashion or connect to multiple cloud providers. The list of third-party providers is currently:
Auto deployments
Users have the ability to auto-deploy deployments with the harpoon API token. Every time a new image is pushed to registry.harpooncorp.com/<USERNAME>/<NAME>:<TAG> with a tag that matches your deployment on the harpoon graph, your deployment will automatically update with the newest image. Below are the steps to enable and use the auto-deployment feature. Prerequisites needed: an image to deploy, Docker Desktop installed on your machine.
Navigate to the top right corner of harpoon and click on your first name.
Click on the “Account” button.
Click on the blue “Generate API token” button.
Now that you have generated your API token, you can start integrating it into your CI/CD pipeline.
If you click on the information icon next to the “Developer settings” text, you will see the steps to accomplish the auto-deployment integration. We will walk through each step below and explain each step in more detail here.
Step 1: Login to harpoon’s Private Container Registry
Use the following command to start the login process. This will allow you to push your image to harpoon’s private container registry:
docker login registry.harpooncorp.com
Step 2: Enter username
Enter your harpoon username. If you have forgoten it you can copy it from the harpoon UI after clicking on the information icon next to the “Developer settings”.
Step 3: Enter Password
Enter your harpoon api token. If you have forgoten it you can copy it from the harpoon UI after clicking on the information icon next to the “Developer settings”.
Step 4: Building Your Image (Optional)
This step is necessary only if you have not already built your Docker image. If you already have an image ready for deployment, you can skip to the next step.
If you need to build an image to push to harpoon’s private container registry, use one of the following commands to start the build process. Choose the command based on the target operating system of your image:
For building a Linux image (use the linux/amd64 platform):
docker build --platform linux/amd64 -t NAME .
For building a Windows image (use the windows/amd64 platform):
docker build --platform windows/amd64 -t NAME .
Replace NAME with the appropriate name for your Docker image. This process prepares your image for pushing to harpoon’s private container registry.
Step 5: Tag your Docker image
Use the following command to tag your docker image properly for a successful push. Replace NAME with image name. Replace USERNAME with harpoon username. Replace TAG with image tag.
docker tag NAME:TAG registry.harpooncorp.com/USERNAME/NAME:TAG
Step 6: Push your Docker image
Use the following command to push your docker image to harpoon’s private container registry. Replace NAME with image name. Replace USERNAME with harpoon username. Replace TAG with image tag.
docker push registry.harpooncorp.com/USERNAME/NAME:TAG
Step 8: Use the Docker Hub Search Dropdown
On the left-hand side of the project, click on the “Docker Hub” search dropdown. Now click on the “Harpoon” search option. Every image you push to the private harpoon container registry will be searchable in this dropdown.
Step 9: Search for Your Image
Search for your image by typing the image name you pushed in the “Search for containers” input box.
Step 10: Deploy Your Image
After you have located the image you would like to deploy, click and drag it onto the harpoon graph to the right.
Be aware that to deploy this image, you will need to have a cluster running. If you have a running cluster, your node element will be glowing blue. If it is not, you can navigate to Using harpoon to watch a demo on how to deploy a cluster.
Step 11: Confirm Cluster and OS Compatibility
If you have a running cluster and the image you dragged out is connected to the correct node OS as the image, you can now hit the blue “Deploy” button.
Step 12: Enable Auto-Deployment
Once the deployment has finished and your deployment is glowing blue, you can now turn on auto-deployment for the deployment. Click on the cloud with a slash through it icon. The cloud will no longer have a slash through it, and that deployment now has the auto-deployment feature enabled. Every time you push a new image to registry.harpooncorp.com with the same image name and tag name as your deployment on the harpoon graph, your cluster will update the deployment to pull the newest image, and your pods will be updated.
Step 13: Integrate with CI/CD pipeline (optional)
If you have successfully turned on auto-deployment, you can now integrate the steps above with your CI/CD pipeline. Given the abundance of options for CI/CD pipelines, this example might not work for everyone and could require adjustments. My username is “atest”, the image name is “harpoondemo”, and I have stored my Harpoon API token in my repository’s action secrets named HARPOON_API_TOKEN. This example is a simple GitHub Actions CI/CD pipeline to build and push a new image to registry.harpooncorp.com/<USERNAME>/<NAME>:<TAG>. It triggers on pushes or merges into the main branch, checks out the repository, logs into the private container registry, builds my image, tags my image, and pushes my image. When this action completes, my deployment “harpoondemo” automatically gets redeployed by my cluster, and pods are updated with the latest image.
name: Docker Login and Push

on:
  push:
    branches:
      - main

jobs:
  build-and-push:
    runs-on: ubuntu-latest
    steps:
      - name: Checkout repository
        uses: actions/checkout@v2

      - name: Log in to Docker Hub
        run: docker login https://registry.harpooncorp.com -u atest -p ${{ secrets.HARPOON_AIP_TOKEN }}

      - name: Build Docker image
        run: docker build --platform linux/amd64 -t harpoondemo .

      - name: Tag Docker image
        run: docker tag harpoondemo:latest registry.harpooncorp.com/atest/harpoondemo:latest

      - name: Push Docker image to Docker Hub
        run: docker push registry.harpooncorp.com/atest/harpoondemo:latest
Travis CI
Make sure in the Travis CI GUI you label the Harpoon API as HARPOON_API_TOKEN. Ensure that where the Harpoon username montana is defined in the .travis.yml file, it’s replaced with your own username. Also, replace harpoondemo with your own project name. Below is the .travis.yml file that should get you started:
language: generic
dist: focal

cache:
  directories:
    - $HOME/.docker

before_install:
  - sudo apt-get update
  - uname -r

script:
  - echo "$HARPOON_API_TOKEN" | docker login https://registry.harpooncorp.com -u montana --password-stdin
  - docker build --platform linux/amd64 -t harpoondemo .
  - docker tag harpoondemo:latest registry.harpooncorp.com/montana/harpoondemo:latest
  - docker push registry.harpooncorp.com/montana/harpoondemo:latest

branches:
  only:
    - master
Next, simply go to the dropdown on the left-hand side, select “Harpoon,” and then search. You should see your project; drag and drop it to the stages screen. You should then see the push. Look at this working example here. You’ve now successfully added harpoon to your Travis CI CI/CD pipeline.
Other
Projects
Users have the ability to separate deployments into different Projects. Projects are physically on the same cluster but logically isolated. In this way, Project A cannot talk to Project B. Users can create a project from scratch or copy existing projects into a workspace.